ZeroDev Tutorial
In this tutorial, we will mint an NFT without paying gas.
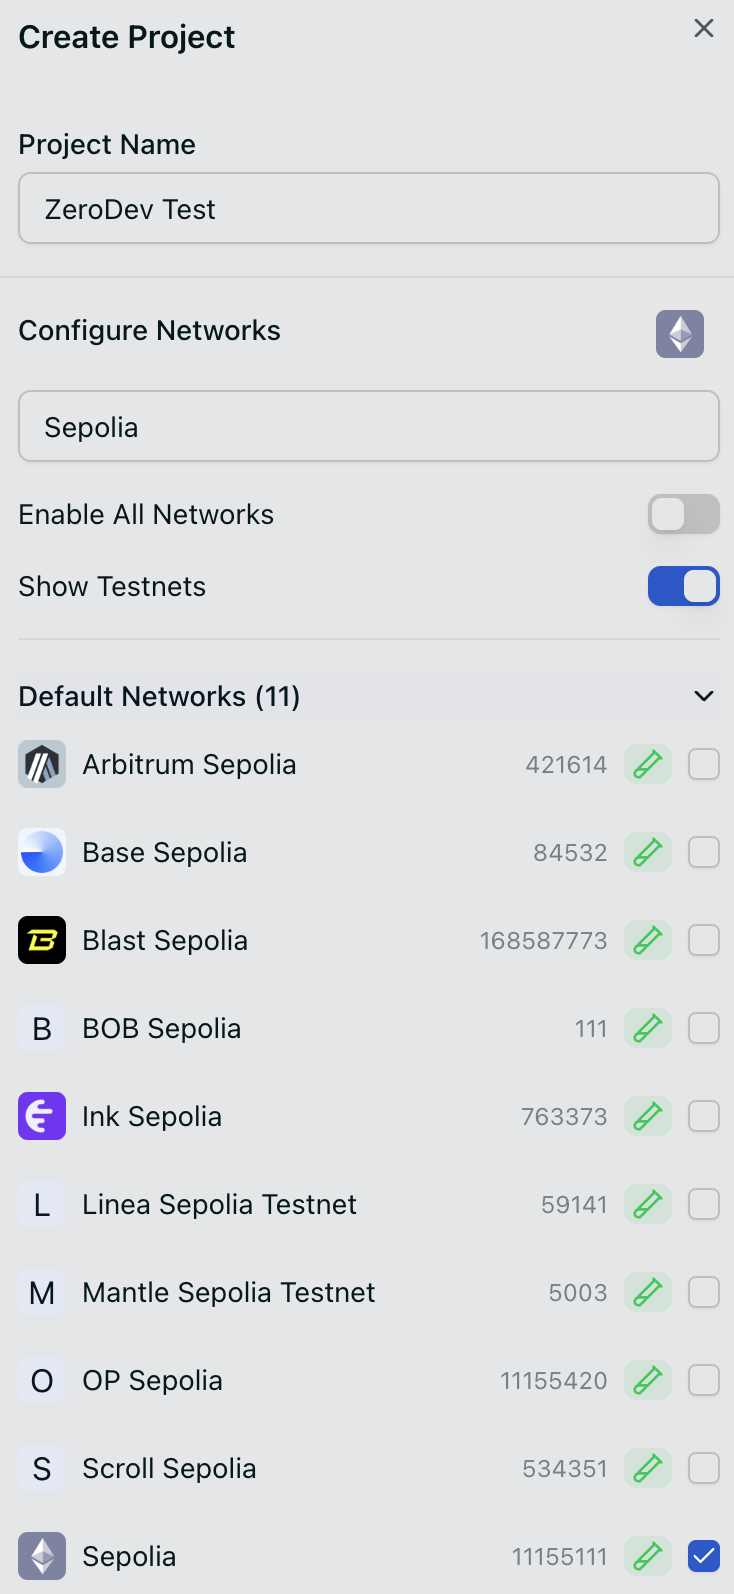
Create a ZeroDev Project
For this tutorial, we will use ZeroDev's AA infra, but you can use ZeroDev with any AA infra provider.
Go to the ZeroDev dashboard and create a project for Sepolia.
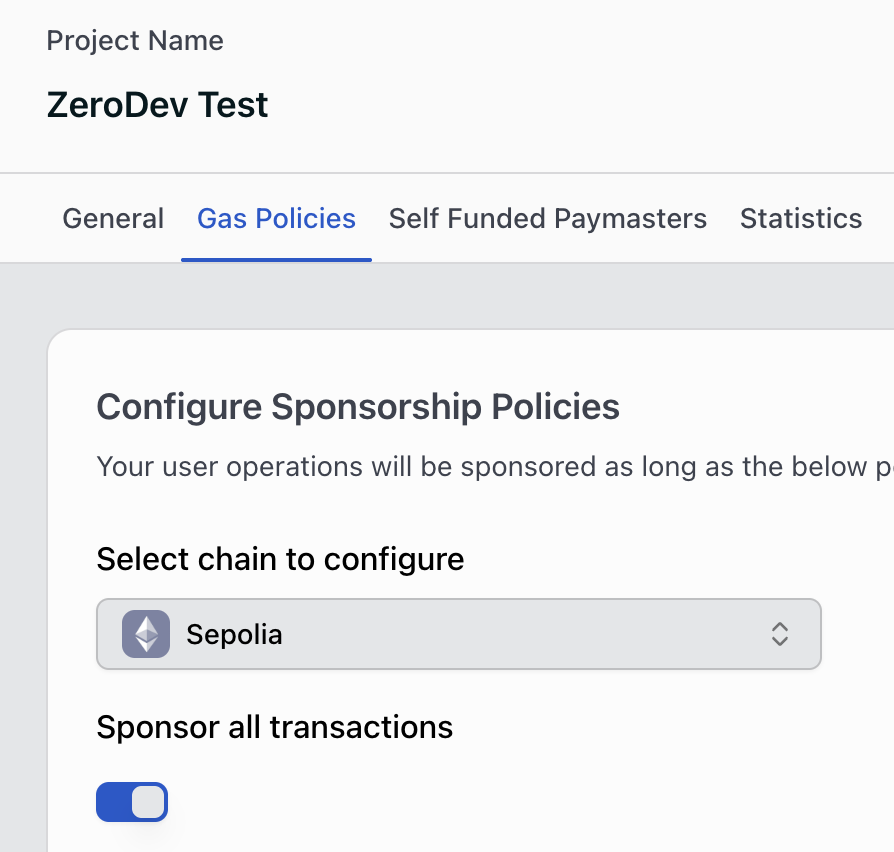
Set up a gas policy
To sponsor transactions (UserOps), you need to set up a gas sponsorship policy.
Go to the Gas Policies section of your dashboard, select Sepolia, and toggle Sponsor all transactions.
Write the code
Clone the ZeroDev examples repo. Then, inside the directory, install all dependencies:
npm installCreate a .env file with the following line:
ZERODEV_RPC=<YOUR_RPC>Replace <YOUR_RPC> with the RPC you copy from the dashboard:

If all goes well, you should be able to run:
npx ts-node tutorial/completed.tsNow open the tutorial/template.ts file in your editor. This will be the template where you will write your code. You can always refer to tutorial/completed.ts to see the completed tutorial code.
Create a signer
Kernel accounts support many different signing methods, including ECDSA keys and passkeys. In this tutorial, we will use ECDSA keys which are the same type of keys that MetaMask and other Ethereum wallets use.
Let's start by generating a random key. Add the following code to the main function:
import { generatePrivateKey, privateKeyToAccount } from "viem/accounts"
const main = async () => {
const privateKey = generatePrivateKey()
const signer = privateKeyToAccount(privateKey)
}Create a validator
Each Kernel account handles validation through a smart contract known as a "validator." In this case, we will be using the ECDSA validator.
Add the following code to create the ECDSA validator:
import { signerToEcdsaValidator } from "@zerodev/ecdsa-validator"
const main = async () => {
// other code...
const ecdsaValidator = await signerToEcdsaValidator(publicClient, {
signer,
entryPoint,
})
}Create an account
We are now ready to create an account. Add the following code:
import { createKernelAccount } from "@zerodev/sdk"
const main = async () => {
// other code...
const account = await createKernelAccount(publicClient, {
plugins: {
sudo: ecdsaValidator,
},
entryPoint,
})
}Creating a Kernel client
Finally, we are going to create an "account client" which serves as the connection between your account and some AA infra (i.e. bundlers and paymasters). The connection is necessary for you to actually send UserOps.
Add the following code:
const main = async () => {
// ... other code
const zerodevPaymaster = createZeroDevPaymasterClient({
chain,
transport: http(ZERODEV_RPC),
})
const kernelClient = createKernelAccountClient({
account,
chain,
bundlerTransport: http(ZERODEV_RPC),
client: publicClient,
paymaster: {
getPaymasterData(userOperation) {
return zerodevPaymaster.sponsorUserOperation({userOperation})
}
},
})
const accountAddress = kernelClient.account.address
console.log("My account:", accountAddress)
}Run this script with npx ts-node tutorial/template.ts and confirm that it prints an address.
Send a UserOp
Now that you have an account client, it's time to send your first UserOp! For this tutorial, we will mint an NFT from a contract deployed on Sepolia.
Add the following import and code:
import { encodeFunctionData } from "viem"
const main = async () => {
// ... other code
const userOpHash = await kernelClient.sendUserOperation({
callData: await kernelClient.account.encodeCalls([{
to: contractAddress,
value: BigInt(0),
data: encodeFunctionData({
abi: contractABI,
functionName: "mint",
args: [accountAddress],
})
}])
})
console.log("Submitted UserOp:", userOpHash)
}There's quite a bit of code going on, so let's go through it.
- We start by calling
kernelClient.sendUserOperation, which takes auserOperationargument. - Inside
userOperation, we specify acallDatafield. This is the equivalent of the calldata field for a normal Ethereum transaction. - Since we want to call the
mint(address)function on the NFT contract, we use Viem's helper functionencodeFunctionDataand give it the ABI, function name, and function argument. kernelClient.sendUserOperationreturns a "UserOperation hash." This is the equivalent of a transaction hash but for a UserOp.
Run the script again with npx ts-node tutorial/template.ts and confirm that it prints the UserOp hash. At this point, you can go to a UserOp explorer such as JiffyScan and find your UserOp with the hash!
Waiting for the UserOp
When you call sendUserOperation, the call returns as soon as the UserOp has been submitted to the bundler, but it doesn't wait for the UserOp to be "confirmed" on-chain. To wait for the UserOp to be confirmed, add the following import and code:
const main = async () => {
// ... other code
const receipt = await kernelClient.waitForUserOperationReceipt({
hash: userOpHash,
})
console.log("UserOp confirmed:", receipt.userOpHash)
}Let's break down the code:
waitForUserOperationReceiptis a bundler action. If you are unfamiliar with the concept of "actions," you can read more about it on Viem's documentation.- This function returns a "receipt" object. If you are curious, you can print the full object and see what it contains.
Read contract state
Now let's confirm that we actually minted an NFT. Add the following import and code:
import { publicActions } from "viem"
const main = async () => {
// ... other code
const nftBalance = await publicClient.readContract({
address: contractAddress,
abi: contractABI,
functionName: 'balanceOf',
args: [accountAddress],
})
console.log(`NFT balance: ${nftBalance}`)
}Run the script again. You should see that it prints NFT balance: 1, confirming that you have minted an NFT!
Next steps
In this tutorial, we were able to mint an NFT without paying gas, thanks to gas sponsorship.
For next steps:
- Check out the core API to learn more about the SDK
- Read some code examples of using ZeroDev